Here's the final installment of the 5 Minute Flapper! This week, spend 2 minutes and learn how to put on a dark, dramatic 1920's eye.

Showing posts with label Tutorial. Show all posts
Showing posts with label Tutorial. Show all posts
Thursday, February 11, 2016

Thursday, February 4, 2016
The 5 Minute Flapper: Brows
Hello again! I'm here with the next installment of the 5 Minute Flapper (although perhaps I should have named it The 5 Minute & 45 Second Flapper, seeing as how those extra seconds add up!). This week I'll show you in a jiffy how to get those perfectly curved half-moon brows that were so popular in the 1920s with flappers and starlets alike.
This video is only a minute and change, so break out your makeup bag and get started!
Friday, January 29, 2016
The 5 Minute Flapper: Lips
Hi there ladies and gents! I've been wanting to do some video tutorials for awhile, so I went ahead and put together my first one! This is the first of three mini-tutorials meant to show you how to transform into a fab flapper of the 1920s, using some simple drugstore makeup. First up, the enviable 1920s Cupid's bow lip in less than 2 minutes!
Next week: those brows, baby!
Wednesday, June 12, 2013
Tea, Earl Grey, Hot!
Well, it's been awhile! Now I'm back, armed with a small lesson about one of my favorite things in the world (just below pie): tea! I don't mean bagged tea, or herbal tea, or tea in a Styrofoam cup; I mean real, proper tea. The sort of tea people like this would drink:
I can't vouch for these people specifically, but I can tell you how I enjoy my afternoon/evening tea. It's delicious, easy, and definitely addictive. Proceed with cautious optimism.
 |
| Source |
Wednesday, January 2, 2013
Amaze Yourself!: Half-moon Manicure
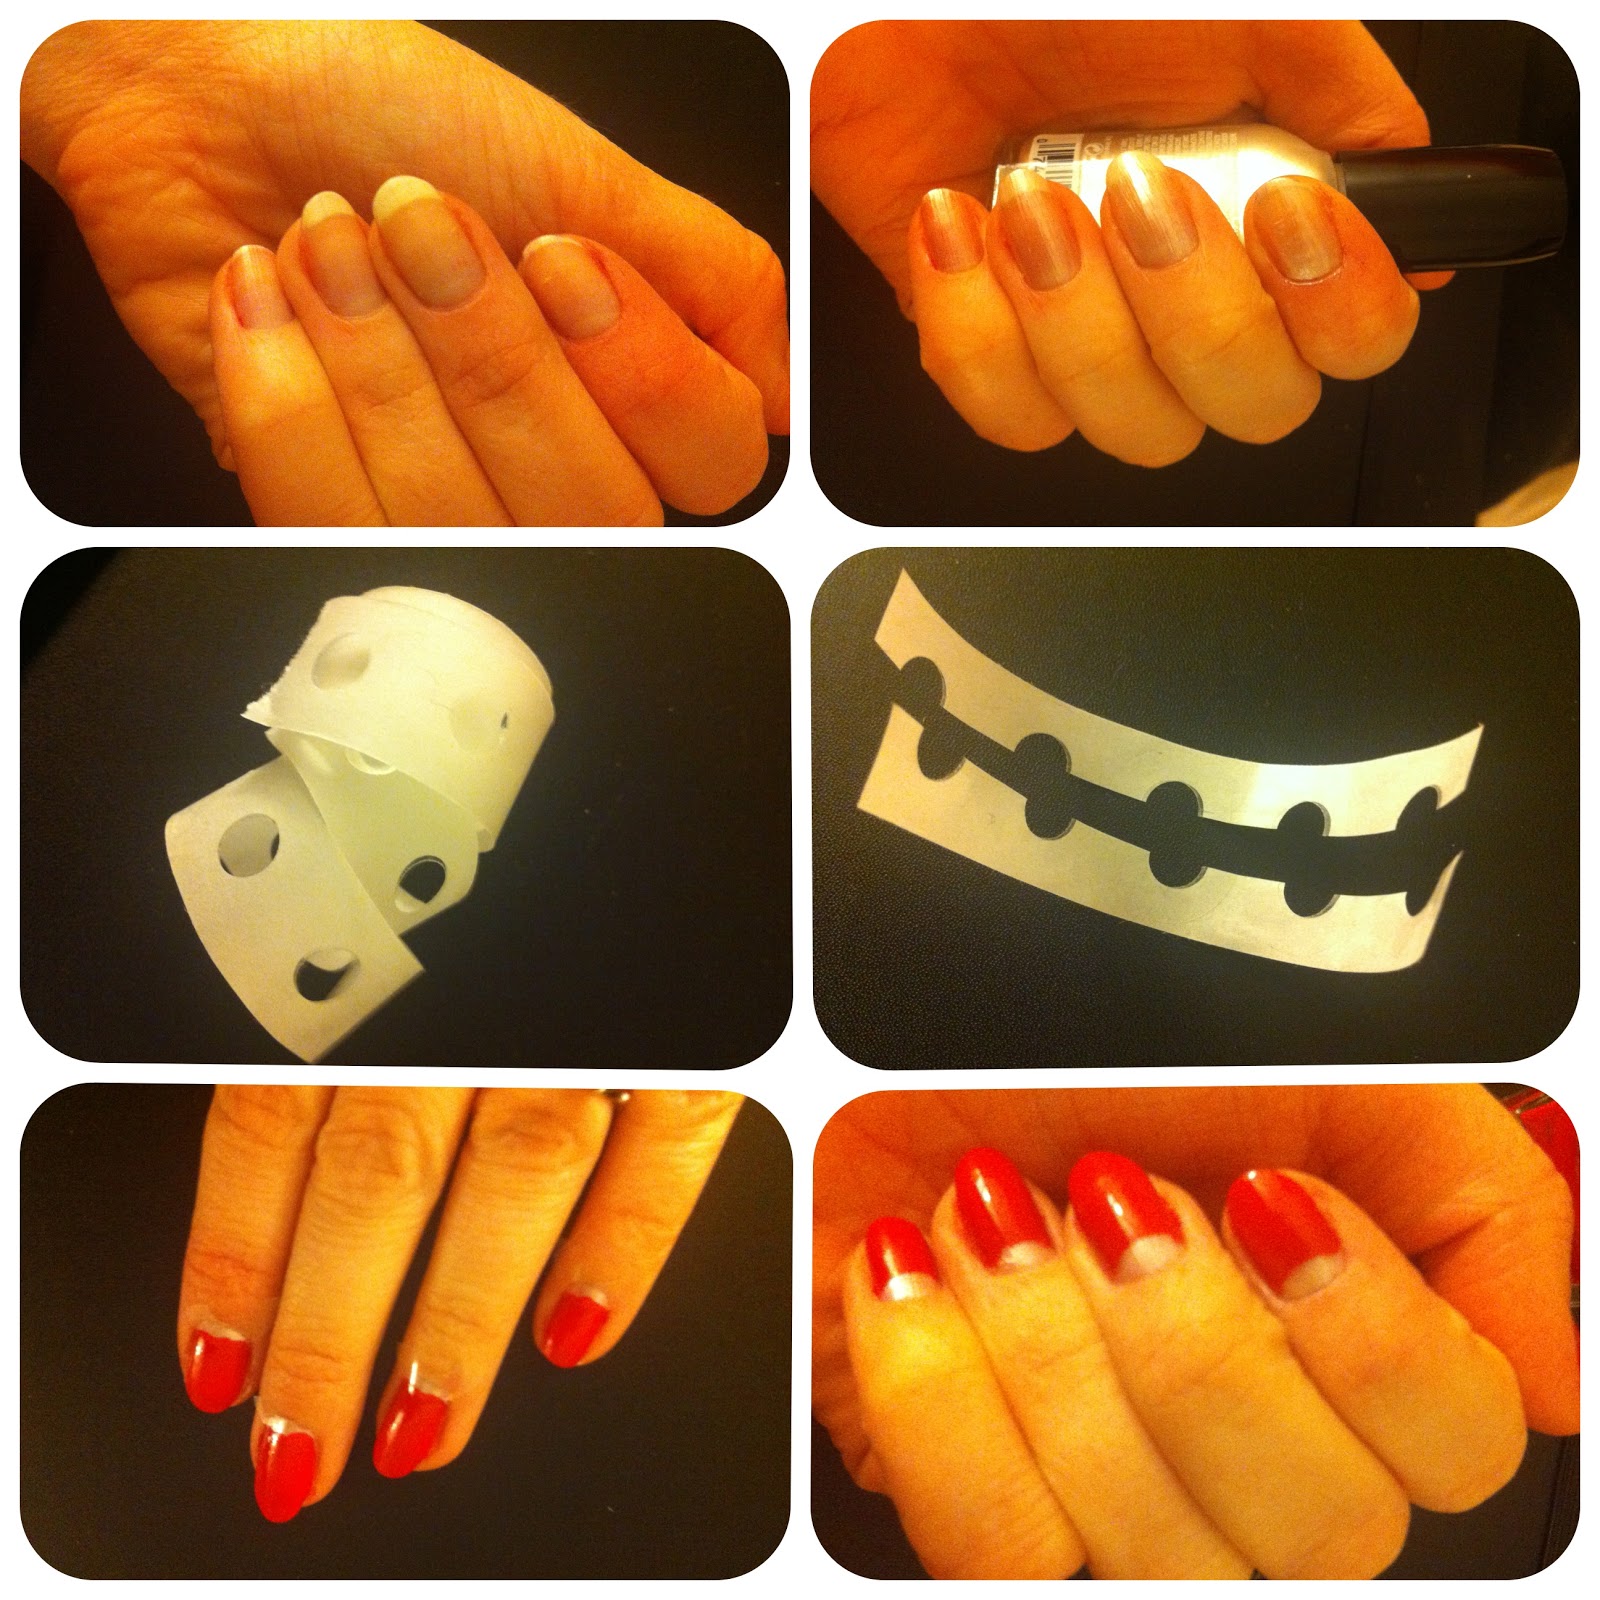
1) Start with a clean slate
2) Paint a first coat of pale polish; let dry.
3) Find those hole-punch reinforcement stickers at an office supply store.
4) Cut in half.
5) Stick them on each nail, along where your half-moons would be, and paint overtop with your favorite red. Be careful not to smudge!
6) Let dry and pull off the stickers.
Mahhhvelous, dahling!
Subscribe to:
Posts (Atom)